If you are currently hosting an application on Heroku using the
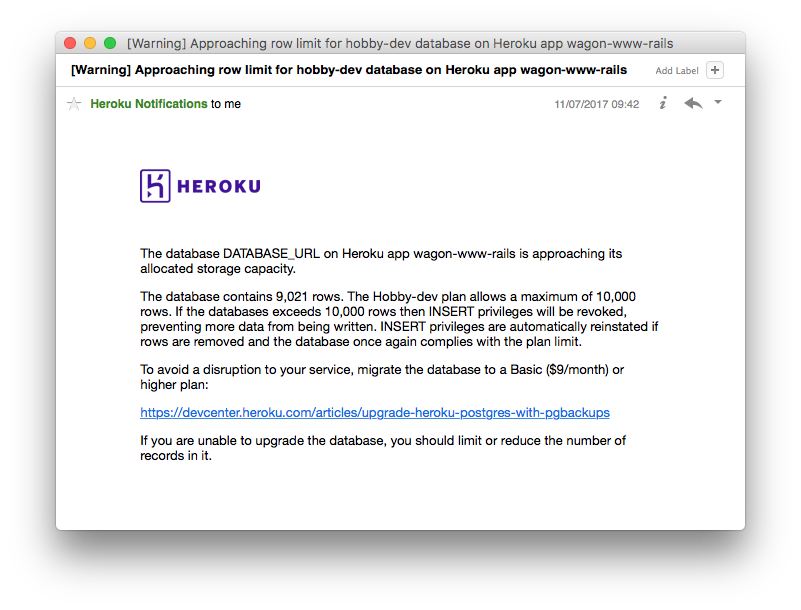
Heroku PostgreSQL add-on, you get 10,000 rows for free with the Hobby Dev plan. This limit may fill up quite fast depending on your app. If so, you will receive an email like this one:
Let's not panic! The first easy solution is to upgrade to the
Hobby Basic plan on Heroku which gives you 10,000,000 rows. That's a lot more! The price is $9 / month. You can follow the
Upgrade with PG copy path to do so. Pay attention to the fact that in the docs, the migration is done on a standard-0 database which costs $50 / month. Use the following first command instead:
$ heroku addons:create heroku-postgresql:hobby-basic
Moving to Amazon RDS
Instead of creating a dedicated database for every new Heroku app, you might want to launch a RDS instance on AWS and create a new database on this instance for every new application. We won't cover the creation of a PostgreSQL RDS Instance here (you can do that easily through your AWS console). But just so you know, we use for that matter a db.t2.micro multi-az instance with 100GB of general purpose SSD, which costs us $29.20/month for the instances (multi site) and $25.30/month for allocated storage. RDS provides daily auto-snapshots to restore backups. Upgrading to a bigger instance class or adding more allocated storage is always possible. You might want to create a parameter group where you set the force_ssl to 1 (not 0) and apply this new parameter group to your RDS instance. That way you make sure that only encrypted connections will be established with your RDS instance.
Creating a new database
We want to provide each app with a dedicated database and credentials. To do so, we'll use the psql binary to remotely connect to the RDS instance (Check that port 5432 is open on this instance for 0.0.0.0/0 through its security group):
$ psql -U $RDS_ROOT_USER -h $NAME.$ID.$DATACENTER.rds.amazonaws.com --dbname=postgresql
It will prompt for your $ROOT_PASSWORD. you can find your amazonaws.com url on the RDS Dashboard, and the $ROOT_USER is the one you specified when you created this instance. The dbname is postgresql if you left this field blank when creating the RDS instance.
Once connected, you can have a look at the existing databases and existing users:
psql$ list psql$ du
OK, let's create a new user and a new database, granting all rights for this user. Let's suppose your Heroku app is named whiteunicorn1234. First generate a url friendly password on your laptop with the following command:
$ openssl rand -base64 32 | tr -d '=/+'
Then in the psql prompt, create a PG user and a dedicated database. Do not blindly copy paste.
psql$ create role whiteunicorn1234 with password 'PASTE_P'W'D_HERE' login; psql$ create database whiteunicorn1234; psql$ grant all on database whiteunicorn1234 to whiteunicorn1234; psql$ q
Add the RDS certificate to your application:
$ cd your_app $ mkdir -p config $ curl https://s3.amazonaws.com/rds-downloads/rds-combined-ca-bundle.pem > ./config/rds-combined-ca-bundle.pem $ git add config/rds-combined-ca-bundle.pem $ git commit -m "Add RDS certificate to app files" $ git push heroku master
Dump your Heroku database locally
⚠️ This will take your application offline.
$ cd your_app $ heroku maintenance:on $ heroku pg:backups capture $ curl -o /tmp/latest.dump `heroku pg:backups public-url`
Load the dump on RDS
The goal is to send all the data which was stored on Heroku to Amazon RDS before switching the DATABASE_URL environment variable on Heroku.
$ pg_restore --verbose --clean --no-acl --no-owner -h $NAME.$ID.$DATACENTER.rds.amazonaws.com -U whiteunicorn1234 -d whiteunicorn1234 /tmp/latest.dump
This will ask for the whiteunicorn1234 password you generated before thanks to the openssl command.
Let's open a new psql prompt and run the following commandes to see if the pg_restore command was successful:
$ psql -U whiteunicorn1234 -h $NAME.$ID.$DATACENTER.rds.amazonaws.com psql$ SELECT nspname AS schemaname,relname,reltuples FROM pg_class C LEFT JOIN pg_namespace N ON (N.oid = C.relnamespace) WHERE nspname NOT IN ('pg_catalog', 'information_schema') AND relkind='r' ORDER BY reltuples DESC;
You'll get statistics on your database tables. Did it work?
Switch the Heroku app to RDS
You will need to destroy your Heroku Database on Heroku as Heroku does not want you to override the DATABASE_URL. This can be a bit scary, so double check that the pg_restore command worked.
$ heroku addons:destroy heroku-postgresql $ heroku config:set DATABASE_URL="postgres://whiteunicorn1234:$PASSWORD@$NAME.$ID.$DATACENTER.rds.amazonaws.com/whiteunicorn1234?sslca=config/rds-combined-ca-bundle.pem" $ heroku maintenance:off
That's it! Your Heroku app is now using a PostgreSQL database on Amazon RDS!
You can now delete your dump with:
$ rm /tmp/latest.dump
Conclusion
Historically at Le Wagon, we have always started new Rails applications using Heroku's default Hobby Dev plan. When and only when we reached Hobby Dev plan's limits, we migrated to Hobby Basic plan and even Standard plan sometimes. At some point it made economic sense to merge all of these databases together on one single Amazon RDS instance.
Bonus
At
Le Wagon, we like using real production data locally when working on new features. That's a good way to safely reproduce a bug a real user had. That's how we do it:
# lib/tasks/db.rake require "uri" namespace :db do desc "Dump AWS production DB and restore it locally." task import_from_aws: [ :environment, :create ] do c = Rails.configuration.database_configuration[Rails.env] Bundler.with_clean_env do puts "[1/4] Fetching DB password from Heroku" db = URI(`heroku config:get DATABASE_URL`) file = "tmp/rds.dump" puts "[2/4] Dumping DB" `PGPASSWORD=#{db.password} pg_dump -h #{db.host} -U #{db.user} -d #{db.path[1..-1]} -F c -b -v -f #{file}` puts "[3/4] Restoring dump on local database" `pg_restore --clean --verbose --no-acl --no-owner -h #{c["host"] || 'localhost'} -d #{c["database"]} #{file}` puts "[4/4] Removing local backup" `rm #{file}` puts "Done." end end end
With this new db.rake file in your repo, you can run:
$ cd your_app $ bin/rake db:import_from_aws
Congrats! You now have a full dump of the production database running on your laptop. Time to rails s and work!


